Wednesday, June 04, 2014

Dark Horse, Raven and Nightmare in the Haunted Forest

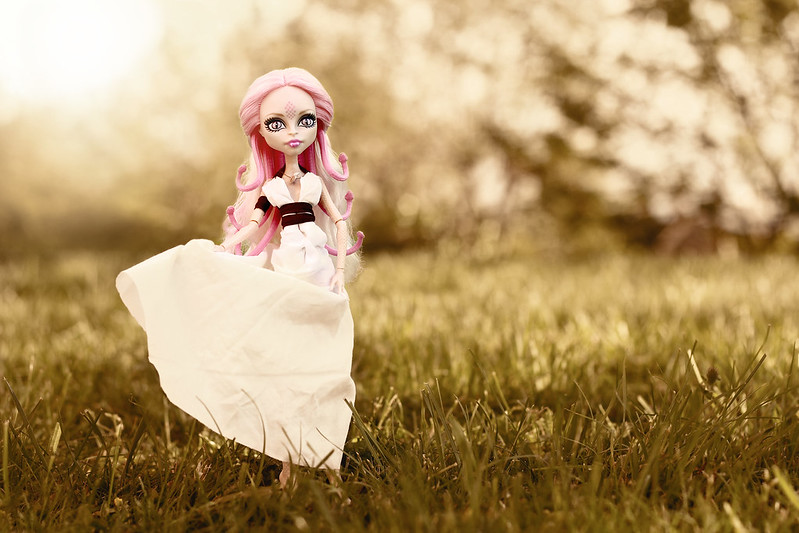
I finally got around into editing these photos of Raven Queen and Nightmare (Headmistress
Bloodgood's horse) in the haunted forest and since I did put a little more work than usual into
these I decided I would share a before and after here on our blog :-)

Dark Horse on Flickr:
Dark Horse

And here's the before:

 A little close-up pict :-)

Before editing:
I just adjusted the lights and darks playing with contrast and then I played with the hues
so the colours would appear more vibrant and warm (look at those browns!).

I think that somehow I re-created the haunted forest scene in Disney's Snow White 
(when I was a child I used to think that scene was so creepy and scary but cool too!):
Original Disney concept art by Gustaf Tenggren.
The dress is from one of our BeGoths dolls, Storm:
Poker Face

 Let's give Nightmare some love with our pictures of her!
A lot of collectors seem not to be fans of Headmistress' horse :-/
they say she's bulky and that it's a shame she's not articulated (unlike Avea Trotter).
I personally think Nightmare's colours are gorgeous and she looks lovely in photos:
Bloodgood & Nightmare
Headless Headmistress Bloodgood and Nightmare <3
Headless Rider

Here's our Sleepy Hollow themed picture of them (Bloodgood is the daughter
of the main character, The Headless Horseman, in the classic American novel).
Sleepy Hollow

Hmmm I think I might have been inspired by Disney again LOL
Screenshot of Disney's The Legend of Sleepy Hollow (1949)
But I love Tim Burton's adaptation more :-)

Last but not least I'll share a snapshot of the first photo's Adjustment/Layers
for those who could be interested:
(You can skip reading this part unless you're into Photoshop).
Signature is turned off on this one since I don't put it for Flickr.
I used a Vignette effect to darken the corners of the photo so the forest looks more scary and mysterious.
 The Curves adjustment layer was used to adjust the colours.
Here there are 2 Levels adjustment layers, one was used to brighten the photo and the other to darken
the forest.
With Hue/Saturation I made the colours more vibrant.
I brightened the eyes on the Eyes layer and I also fixed some hair flyaways and stuff.
Background is the original photo.
...
Hope you enjoyed this post ^__^

Love <3
Mariko.

Friday, May 23, 2014

Cooking a Rhubarb Pie... with Honey Swamps!

The other day I felt like making a pie and I thought why don't I take pictures and post a how to/recipe on this blog?
Obviously, I had to pick a little assistant model for my photos and my choice was Honey ^__^

So today's recipe is for a rhubarb pie a la française! That means French style haha

There's a possibility that you've never heard about this vegetable though, apparently it is rare to find in some parts of Europe
and America... but it's always worth it to try new things! Especially veggies and fruits :-)

So, what is rhubarb? It's a vegetable that looks a bit like celery (I don't think you can it eat raw though).
We cook the stalk in pies with sugar, a lot of sugar, because its taste is kind of very sour/tarty.
You can also make jam/marmalade with rhubarb, I never tried but it sounds good :-P

If you've never seen rhubarb then this is what it looks like.
Thanks for showing us Honey :-)

Here's a picture of the ingredients for our French Style Rhubarb Pie:
List of Ingredients:

600g / 21oz Rhubarb
1 Pie Dough (the type I like best is puff pastry but you can also use shortcrust)
170g / 6oz Sugar (you can add more or less depending on how sweet you like your pies)
250ml / 1 cup Cream (Crème fraîche or Half-and-Half)
2 Eggs
and last but not least
Cinnamon and/or Vanilla to taste.
 ....

OK let's begin by washing (rinsing) the rhubarb with water and then we'll cut/chop it until
it looks like this (obviously, we'll discard the top leafy part of the vegetable and only use the stalk):

At this point you can pre-heat the oven at 200°C / 400°F

Now break the eggs and beat them (just like you would for an omelette) in a big bowl.
 Then we'll add the cream, sugar and some vanilla and/or cinnamon and mix everything together until the sugar melts
(you can taste the mix and add more sugar or more vanilla/cinnamon if you want).
Next we can add the rhubarb to our mix.

Put the bowl aside and prepare the pastry dough...

Lay the dough on a pie pan or an oven pan (mine is huge and it's square too!)
Don't forget to make holes in the dough with a fork.
Here I use a chick to illustrate this step xD

And now we can pour our mixture with the rhubarb onto the dough, like so:
 Move the pieces of rhubarb around until they lie uniformly flat :-)
 Also, if you like your pies to be extra pastry you can cover it with some more dough.

Finally put it in the oven (that you pre-heated at 200°C / 400°F)
and leave it there for around 40 minutes
(but I left this one a good 50 minutes until the crust was a nice golden brown):
The sun is setting and Honey is happy with her work ^__^

Here she's enjoying a BIG slice of pie with a cup of tea

Hopefully someone will like this recipe and get some ideas out of it :-)
Anyways I had fun taking the pictures and writing it down.

If you have any questions (especially about cooking) don't be shy to ask.
I'll be happy to help the kitchen noobs out there LOL

Love <3
Mariko.

Friday, May 09, 2014

DIY a Spartan/Greek dress for Viperine

As promised here's some close-up pictures of Viperine wearing the 300 Queen Gorgo dress ^__^


I couldn't resist to edit Viperine's photos in a 300 style again so, just as a curiosity,
I post a third photo that has no editing or filters etc. only a watermark.


Notice the necklace. I believe the pendant is supposed to be a tooth?
We made ours by clipping a q-tip and then painted it with some gold nail polish.


The dress from behind:
The clip in her hair is a quick fix for a polished hairstyle.
 As you can see her dress is just a recycled handkerchief ;-P
 
Queen Gorgo of Sparta

 Check my previous post where I show what I did in Photoshop to recreate the look of the movie :-)

Love <3
Mariko.

Monday, May 05, 2014

Photo Editing, Recreating the 300 look!

My sister had a really good idea to celebrate her 300 followers on instagram, a 300 themed picture!

300 is a 2006 film directed by Zack Snyder that is actually based on a comic by Frank Miller (he's
responsible for Sin City too).
A sequel to this movie, Rise of an Empire, came out a few months ago but I haven't seen it yet :-P

Now, onto the picture.

First, let's take a look at the before and after:


The change is pretty dramatic :-)

Sorry about the watermark but it's cute, right? On a next post I'll show you how to
create your own signature so you can add them to your photos.

Before we go into details I just want to say that my sister did a beautiful job on sewing Viperine's dress.
In case you haven't noticed yet, it's based on what Queen Gorgo wears in the film:

Before doing anything to my photo I saved some stills from the film to keep as reference and
also to have as inspiration, example:

And of course, a poster of the film too:

I Googled and searched a PNG or PSD image of the 300 text
(feel free to save this pict for your project):

Why PNG or PSD? Because these type of pictures usually, if you're lucky, will have their
background blank (removed) so you can put them directly onto your picture without needing to
cut them out yourself (someone else did the job for you and saved you some time yay!).

I also found this video that gave me some ideas on how to do things:
https://www.youtube.com/watch?v=bo6Mm1FFnzA

Now here's a you a caption of my Photoshop layers:

As you can see I did borrow some tips and tricks from the video tutorial. I'm going to explain what these layers are for, from the bottom (first layer) to the top (last layer).

The 1st layer is the Background layer, it's the original photo, nothing altered.

The 2nd layer is Background Copy and it's exactly that, or it was until I made my changes by
using Content Aware and Clone Stamping to fix distracting things like hair flyaways and
glares in the eyes. I also made made the whites of her eyes a little brighter with the Dodge Tool
so they really POP!
Notice I Masked this layer to bring back some parts of the original Background layer. If you
don't know about Masking, well, you really should! It will save you in a lot of situations!!! I
recommend this video to learn more about Masks (and it's under 4 minutes long!) :
https://www.youtube.com/watch?v=Ztywetz3DO4

The 3rd layer is a Levels adjustment layer and what I did with this one is just some contrasting
by simply sliding the first arrow to the right. Again, I did some Masking here because I didn't
like it how some parts of the photo looked with too much contrast.

The 4th adjustment layer is Hue/Saturation. The photo was too colourful for our 300 look so I
lowered the saturation to -65. But of course, I didn't want Viperine to be de-saturated, only the
background! So I brought back her colour by painting the Mask (again LOL).

5th adjustment layer is for Color Balance. I pumped up the reds, decreased the greens and
added a little bit of blues. Again, I didn't want this to affect Viperine so yeah, I Masked again by
painting her silhouette black (black conceals, white reveals!).

Adjustment layer number 6 is a Gradient Map! For this layer I actually followed the
instructions of the How to: 300 Look video tutorial that I linked above. Basically you just add
the layer and then you choose a gradient, in this case I chose Gold 1.

The 7th adjustment layer is Photo Filter. I did this one because it was instructed in the how to
video too and I thought it looked good so I went ahead and chose a custom orangey brown
colour and completed the look (it also gave Viperine a nice Greek Goddess tan LOL).

Number 8, Sunbeam, is just a layer that has been painted with a spot of white on the top left part.
By doing this I got a nice little lightbeam on my photo.

Layer 9 is the 300 text (the PNG file that I showed you previously). I clipped 2 layers on it
(clipping means these two layers only affect the image it's been clipped on) so I could turn it
from bloody red to a cute pink that I color eyedropped from Viperine's snakes (I got the perfect
matching colour that way!). Also notice the FX, Effects, Drop Shadow. Yes I put a little shadow
under the text, just like on the poster. Click with the left button of your mouse on the layer you
want to drop shadow onto and then click on Blending Options (it's first on the top!). There
you'll find shadows and other cool things ;-) You can also use Blending Options on a Text Layer.

Sounds like I did a lot! But work flies when you're having fun editing and of course here the
work was extra compared to a normal photo since we're trying to copy a surreal look from an
artistic looking film.

If you want to try this 300 look I can assure you that you will already get a pretty good effect by
doing a simple version of what I did.

The picture on our instagram:

On my next post I'll show you some close-up picts of Viperine's with her Greek Dress ^__^
(I'm not sure if I'll edit those picts with a 300 effect yet, will see...).

Love <3
Mariko.

Monday, April 28, 2014

M&S's Flickr Greatest Hits!

First post on this blog, hello everyone :-D

OK so I wanted to begin this blog by doing a compilation of our best photos that we have on our Flickr
(here's a link to our photostream: https://www.flickr.com/photos/marikosusie just in case ^^)
We've been there for more than four years now (time sure flies when you're having fun haha).

Let's start with our most viewed, which are these two Halloween themed picts:
It's Halloween at Monster High!
From left to right: Cleo de Nile as Spiderella (a classic Halloween costume, don't you agree?),
Deuce as a skeleton, Draculaura as a witch,
Clawd as Harry Potter (renamed Hairy Clawder by one of my Flickr contacts xD),
Pumpkin Queen Clawdeen and Cemetery Ghost Frankie.

Halloween Costume Party at MH!
From left to right: Spectra as a Fairy, Abbey as an Angel,
Lagoona as a Mermaid and Ghoulia as a Devil.

The backdrop in those two pictures is a Nightmare Before Christmas poster by the way ;-)

I love these photos because my sister and I had a very good time coming up with their costumes
(and we did this only days before Halloween!) so it makes me really happy that they're our top
most popular photos :-D

Most of the costumes were actually handmade and I think the craziest one was Deuce's skeleton outfit.
It was made by sticking (well stitching actually) one of those skeleton toys they sell you at a $1 store
around Halloween time.
I was pretty proud with Abbey's Angelic outfit and Ghoulia's Devil costume, it was really fun making
the wings, halo, horns, tail and the pitchfork xD

Ghoulia's Helloween!!!
I love these Halloween pumpkin lights sooo much!

Another thing, I remember the Monster High official Facebook featured the first photo on their wall
which explains why it got so popular (but that happened two Halloweens after we took these picture
LOL).

Another Holiday themed shot, Flickr considers this one our second most interesting photo:

And this one is the first most interesting:
(I need to do a remake of this one now that I have more pets.)
Pets

Another interesting photo that I love:
Aphrodite

Now, onto the most Favourited:
Mother Monster
The Corpse Bride Emily (who technically is a zombie, right?) with Ghoulia Yelps.

This picture is not actually our most favourited one right now on Flickr but it was the most favourited
one for 4 years so I thought she deserved top spot in this blog post.

Another top picture I personally like a lot:
Scary Monsters and Nice Sprites    
I got the idea for this after noticing that Venus' hairstyle was similar to Dubstep artist Skrillex.
The backdrop is my computer's screen and the outfit is from a BeGoths doll
(I'll talk about those at the end of this post).

Next another popular photo that I had fun making and adding special effects in Photoshop:
Water vs Fire
This picture always makes me think of the X-Men.

And I think we're going to end this Greatest Hits post with some more of my favourite most popular shots ^__^

Cupid's Hunt on Valentine's Day!

Egyptian Vanity

Tennis Match

Last sunny days...

One more thing, remember the BeGoths dolls I mentioned before?
Here's our first pict we ever posted on Flickr:

Hypnotica Gaze In her Garage

That's a BeGoths.
Those were the dolls we collected before Monster High existed, they were Gothy and fun and
of course we still have them, they're happy living on their own shelf ^__^
You can see more photos of them here:
https://www.flickr.com/photos/marikosusie/sets/72157623166780825/

OK so thank you so much for making it this far and now that I've introduced myself (or introduced
us, me and my sister's work that is haha) I hope to write informative posts in the future with tips
and tricks on photography :-)

Love <3
Mariko.